


Some of you asked about the satin stitch edging I did on the last cruciform quilt. This is an edging that both Sue Benner and Charlotte Yde do on their quilts. It requires a fairly stiff surface. Sue’s fused quilts provide this. Charlotte uses tear away stabilizer between the batting and the backing. It is not torn away and does leave a stiffer finished product, but for a wall quilt, sometimes that is better.
To show how I do this, I will use a post card as an example. I work on two opposing sides at a time. The first pass is a simple default setting for the zigzag stitch. On a large quilt, I would use a beige or gray thread so that I don’t waste good thread which will be covered. It is important to leave fairly long tails of thread on each end of the stitching.
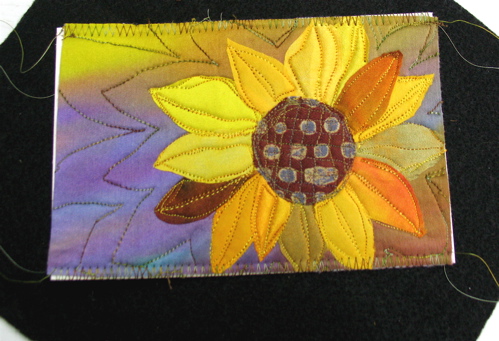
After you have done two sides, zig zag the other sides, leaving tails.
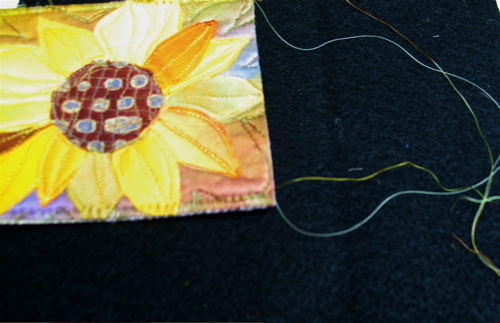
Then set the zigzag stitch for satin stitching. On my Janome, I set the width slightly larger than default and the stitch distance at .50. Again, do two opposing sides at a time and use a thread that enhances your design. I usually use a variegated thread that has the colors of the quilt. It gives a stripey look to the finished edge. Be sure to hold the threads from the first pass out of the way. They actually help you to get a good start from the edge on the satin stitching.
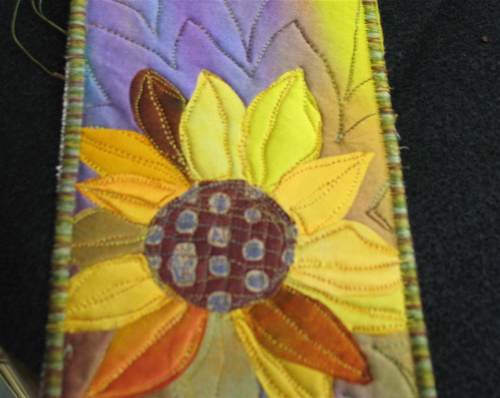
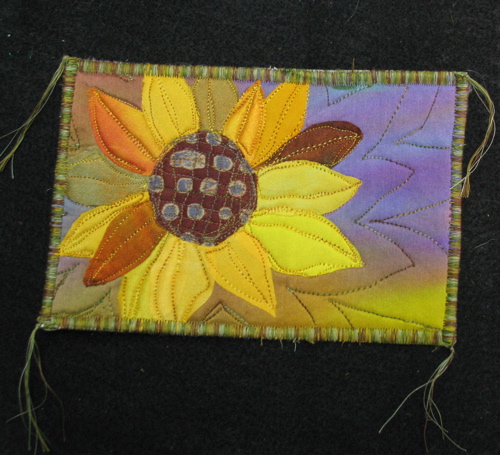
After you have finished two sides, do the other two sides. On a post card, I call this done. On a quilt, I usually do another pass, that is slightly wider. When you have stitched all the sides, tie the threads together. I usually use a needle or stylus to help me get the knot close to the edge. Then trim the threads to a pleasing length for the size of the quilt.
That is it! Let me know if anything I said is confusing!!
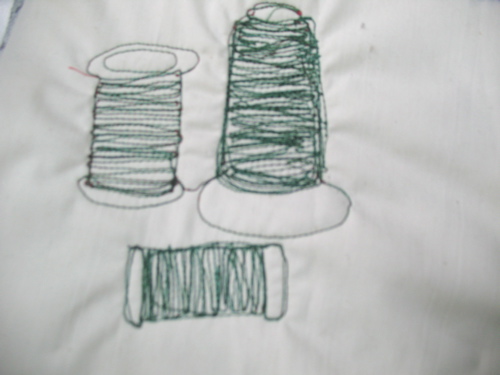
Here are a couple of thread doodles that I did a while ago and decided not to post. But, here they are!! The first is a true “thread” doodle.
Judy quilted some beautiful circles on one of her quilts recently, and I decided that I needed to practice quilting circles because I love them.

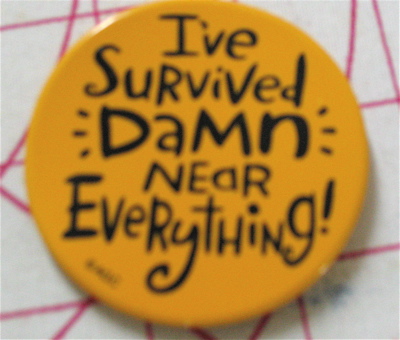
I was doing some sorting and cleaning in my studio and found this button that my good friend Pat gave me a while ago. It seems even more apropos now that I have added skin cancer to my list of crappy stuff.
I had the little bitty surgical removal of the skin cancer cells yesterday. I’m happy to have that over.
Tonight is the quarterly meeting of Columbia Stitchery Guild at the Interstate Firehouse Cultural Center, the location of our show. Trisha Hassler is the guest speaker. If you want to be wowed, click on her name to see her work.
Hi Gerrie!
Thanks for that tutorial on the satin stitched edging. I’m going to have to give it a whirl…maybe even tonight!!
I’ve been going to ask you if you knew of or knew Trisha Hassler. That was such an interesting article about her in Quilting Arts mag.
Glad you got the skin cancer thingy removed. Having thoroughly abused my skin at a young and even not-so-young age (aka I should have known better!), I’ve suffered through both a basal and a squamous removal. The former was a piece of cake, but the latter was no joy ride. Needless to say, I rarely go out in the sun…and when I do I’m well protected!
Those are some darned fine circle you got there!!!
xo
Tie the ends together at the corner?! So clever. In fact, I tried it on a few Father’s Day Creations.
Thanks for sharing your wonderful satin stitch edging idea. Hope you are healing well too.
I’m used to satin-stitching appliques on children’s clothing, but I think the double-pass idea is great for quilts or other pieces where dimension is wanted. Nice tutorial. (And I covet that button!)
Beautiful sunflower!
I hope all the bad cells are forever gone.
nice of you to share…You are a good egg!
Thanks for the tutorial….it looks easy to do and I really like the way the edge turns out…..I’m going to try it soon.
Trisah works with the metal objects…oooo, I hope you can share with us a little of her presentation. I posted a picture of the bumper sticker on my car…getting ready to email it to you now.
I adore Trish Hassler’s work. I’ll be eager to hear about her lecture. So glad the skin cancer thing is taken care of.
I wouldn’t have thought of the 2-pass satin stitch, thanks for the tutorial. Anchoring it first makes all the sense in the world.
Wow! is right. I’ve been seeing her name/work popping up all over the place lately — good for her!
Funny thread doodles! I love circles too. I wonder why I don’t use them more often?
Wow is right! What wonderful artwork! Does she do the metal working herself? Thanks for the tutorial, I’ve wondered for a while how others get such nice satin stitched edges. Love the button! Take care and heal! cheers